Appearance
Debugging
TODO - vscode uitleggen hoe je binnen de omgeving kunt debuggen
VSCode
Webstorm
Debugging in Webstorm is a little bit different from debugging in VS-code. Instead of using the terminal to debug, you can use the IDE itself to debug your applications.
Setting up your debugger
Setting up your debugger in Webstorm takes a couple of minutes and needs to be done for every project the first time you open them. After the initial setup you won't have to worry about it anymore, since the IDE keeps track of what you set up for each project.
Technically it's possible to export run configs, but this would require us to save the files in our git repo, which we don't want to do.
Don't worry, the setup is pretty basic and will help you in the long run.
Setting up the test debugger
To debug (or run) tests, you can configure the built-in IDE test runner to work with our tests. To do this, follow these steps:
- Double press Shift (⇧) to open the 'Search Everywhere' menu.

- Search for "Edit Configuration" and open it.

- Press "Edit configuration templates"
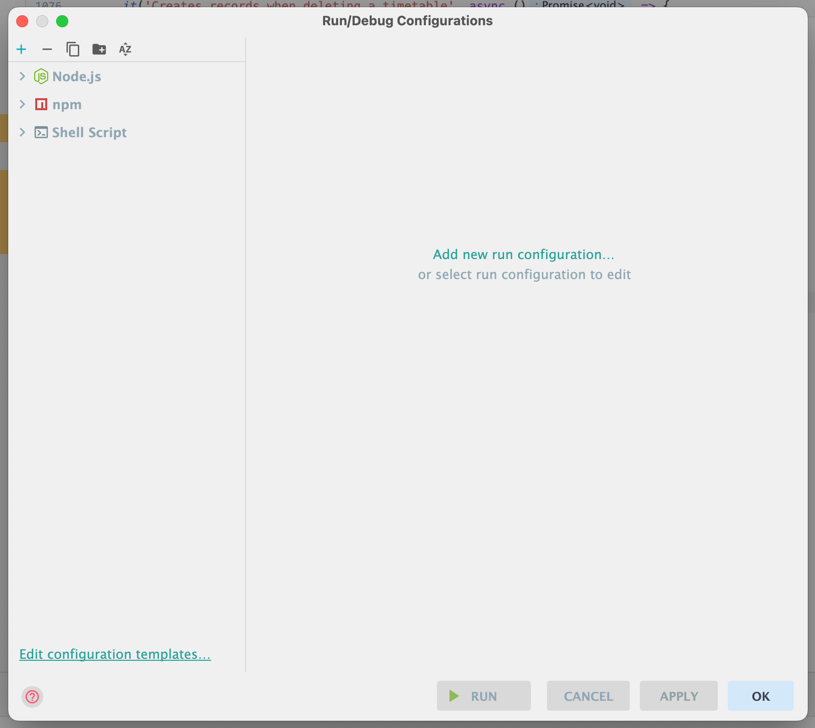
- In the list of all configurations search for the "Node.js Test Runner"
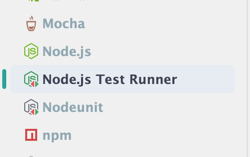
- Configure the debug/run configuration:
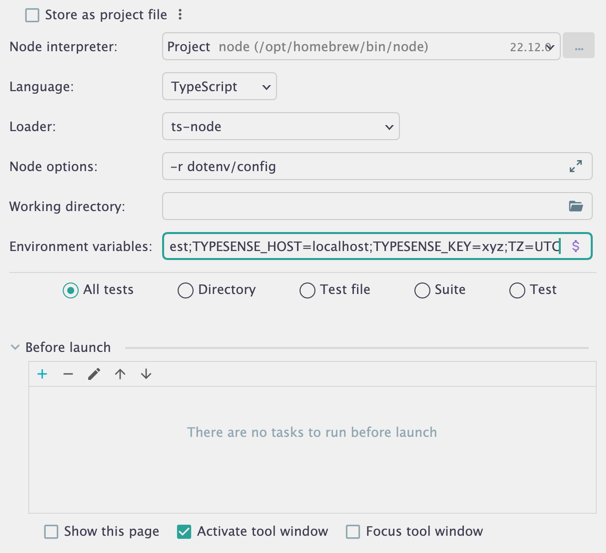
- Node interpreter:
Project - Language:
Typescript - Loader:
ts-node - Node options:
-r dotenv/config - Environment variables: Can be copied from the
.env.testfile.- Copy the contents of your
.env.testfile. - Open the environment variables in the debug/run configuration.

- Paste the contents of your
.env.testfile into the environment variables by pressing the "Paste" button.
- Press
OK
- Copy the contents of your
- Radio button:
All tests
- Node interpreter:
The
ts-nodeloader needs to be a DEV-dependency in your project. This should be OK if you're using the project template.
- Press
OKuntil all config windows are closed.
Optional: You can set up pnpm commands to run before your tests. This can be done in the same window as in step 5 and might be handy if you don't want to have to manually run the
pnpm cleanandpnpm buildcommands every time you made changes to your application.
Now that you've set up the test runner, you can go to any test file and use the built-in buttons to run or debug them. 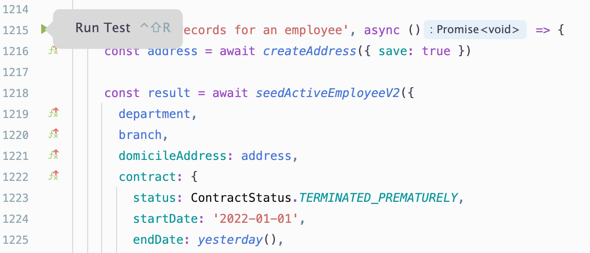
Setting up the playground debugger
Unfortunately the playground file doesn't have a built-in debugger. This means that we need to configure a new debug/run configuration.
Navigate to the 'Edit configuration templates' menu like we did in the first three steps of setting up the test-debugger.
- Press the '+'-icon to add a new debug/run configuration

- In the list of all configurations search for "npm".
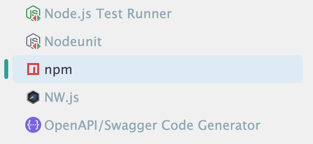
- Configure the debug/run configuration:
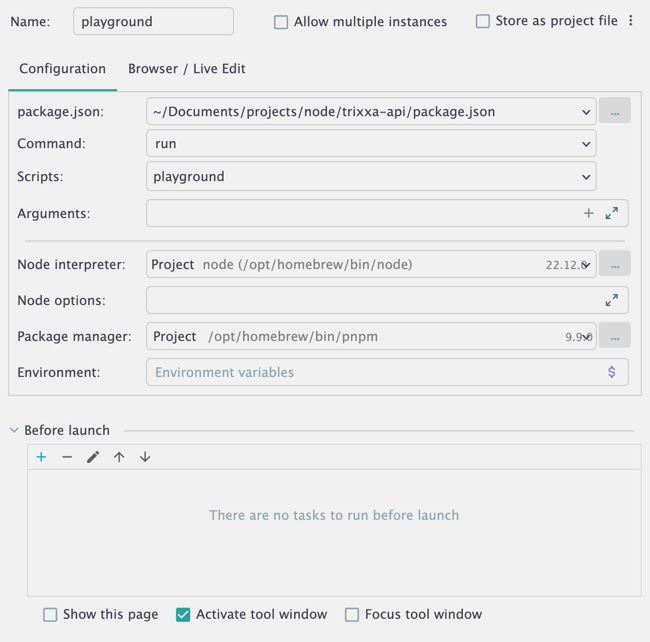
- Command:
run - Scripts:
playground
- Command:
- Press
OK
You can use this debug/run config by selecting it in the top right corner of your IDE and pressing either the "Run" or "Debug" button, depending on your needs. 
Optional: Just like the test run config, you can set up pnpm commands to before running the actual playground command. Normally you won't need this since the playground command itself builds your app before executing it.
Debugging tips
Here are some basic (and more advanced) tips to use the Webstorm debugging-functionalities:
- You can place a breakpoint by hovering over the line number of the line you want to break at. (Note: the line needs to contain actual code!)

- You can temporarily disable a breakpoint by right-clicking the breakpoint itself and disabling the 'Enable' radiobox.
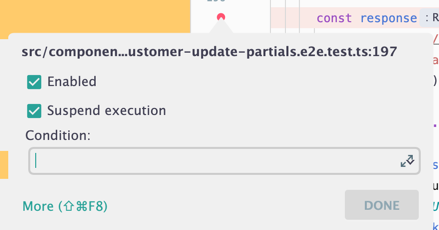
You can also make it so that the breakpoint is only triggered when a specific condition is met, or that it doesn't pause your application.
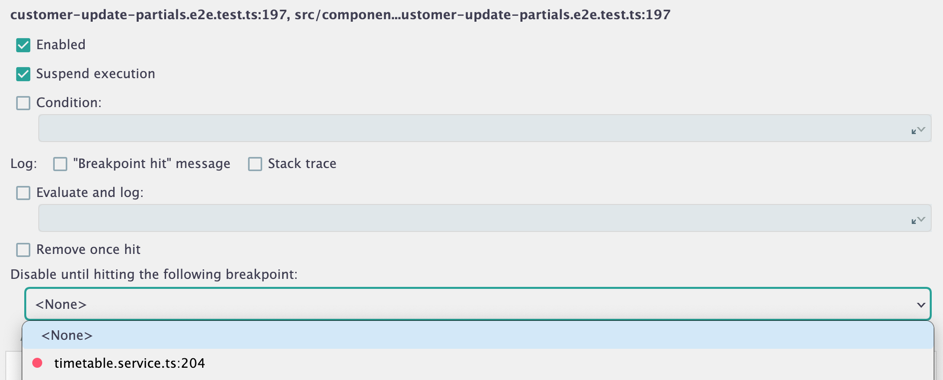
- You can disable a breakpoint until another breakpoint you set has been hit. Right mouse button click the breakpoint, go into the "More" menu and select the breakpoint to want to wait on in the "Disable until hitting..." section.
- You can remove all breakpoints by opening the 'Search Everywhere' menu (double press Shift ⇧) and searching for the "Remove All Breakpoints" command.

There is also a Remove All Breakpoints In The Current File option.
- You can create other debug/run-configs according to your needs.
- You can run a line of code or even add watches by making use of the "Evaluate expression or add a watch" section of the debugger.

The debugger has a lot of features, try them and find out what works best for you.
